Contents of this Page
- Prepare Document
- Request Signatures in Acrobat
- Prepare Signature Fields
- PSA Routing Process
- Sending Documents
- Resources
Prepare Your Documents Before Signing
Convert your file to PDF if it is not already a PDF
- Open the Word document you’d like to send for
- If you are sending a Resolution for signature be sure to add the votes for the Resolution in Word before exporting the file as a PDF.
- Save the file as PDF:
- Select File, “Save As”
- Select Browse and choose a file *Make sure the “Save as file type” has PDF selected.
- Please note: if you are sending a PSA that has gone through the routing process you will need to attach the routing slip to the end of the agreement.
- Be sure to save the file with a name that people will understand.
Requesting e-Signatures
Use Adobe Acrobat to send your document for signatures
- Open the PDF in Acrobat Pro
- Select “Request E-Signatures from the tool bar
- When the pop-up opens enter the email of one of the recipients
- Click “More Options”


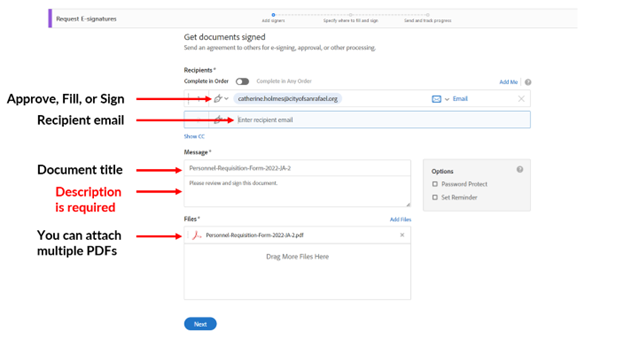
- You will now see a screen that allows you to:
- Add all recipients
- Select if they approve or sign the document
- Create a description of the document you are asking them to sign
- Add more PDFs to the batch if needed.
- Add all signers (and approvers if needed)
- Be sure all recipients have the correct designation (sign, fill, or approve)
- Add a description that summarizes the document you are sending for signature. This is important for PSAs that are going to the City Manager
- Click “Next”
Preparing the Document Signature Fields
Designate the fields that need to be signed.
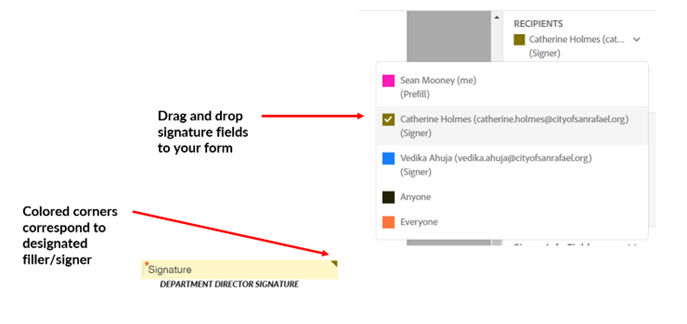
- Each recipient can be selected in the “Recipients”
- Scroll to the location of where the first signature line is located for the first On the right-hand side of the screen, click and drag the Signature block and place it on the blank signature line.
- If you have multiple signers, change the recipient by selecting the recipient drop down in the upper right-hand Colors correspond to each signer.
- Some contracts may have “Name” or “Title” These can be found in the Signer Info Fields section. Click and drag the “Title” and “Name” fields to the appropriate area for the recipient.
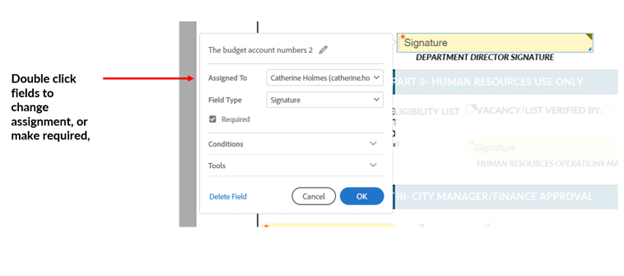
- Double-click a field to change the recipient or make required.

*Special Considerations for Professional Service Agreements
- PSAs need the contract routing form attached to the contract PDF
- Be sure to include a message in the message box summarizing the context and purpose of the agreement
- Please follow the approved routing process
- Signer - Vendor email (if a corporation, requires two signers)
- Approver - laraine.gittens@cityofsanrafael.org
- Signer - andrea.visveshwara@cityofsanrafael.org
- Approver - city.clerk@cityofsanrafael.org
- Signer -cristine.alilovich@cityofsanrafael.org
- Signer - city.clerk@cityofsanrafael.org
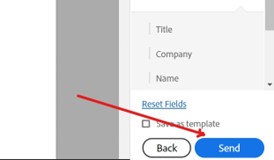
Send Your Document for Signature
- Once all the Signature blocks have been placed next to their respective recipients, send the document for signature by selecting “Send” in the lower right-hand corner.
- The documents will be sent to all recipients for If you selected for them to be completed in order the document will be sent one at a time to each recipient.
- After all recipients have signed a certified copy of the signed PDFs will be sent to all This document cannot be edited after it has been signed and certified.
Resources