This video reviews how you can record a Teams meeting, share the video in Microsoft Stream, and control who sees the video.
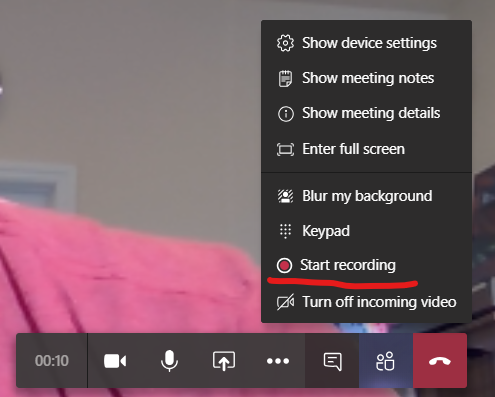
- When you are in a Microsoft Teams meeting, click the menu icon (ellipsis) and select “Start Recording.” This will start the video recording.
- After the meeting is over press the menu again and select “Stop recording.” The meeting will stop recording automatically if all participants leave.
- After the meeting has ended it will take a few minutes for the video to finish processing. Microsoft will send you an email when it is ready. It usually takes about 10 – 15 minutes.
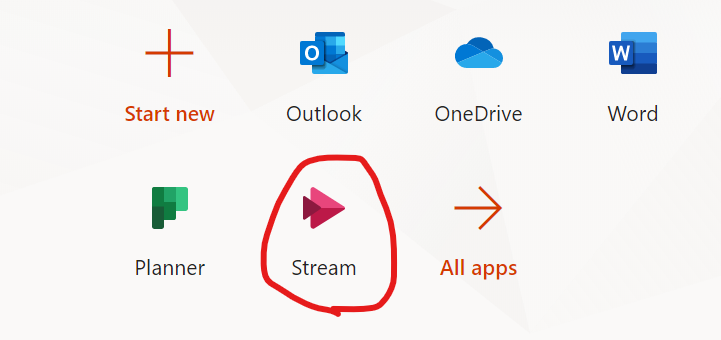
- Go to the Microsoft 365 portal and go to the Stream App. If you do not see Stream in the app menu select All Apps to find Stream.
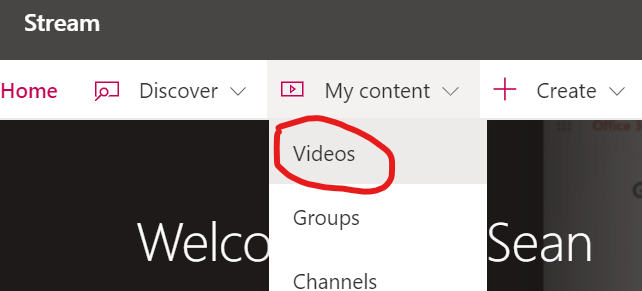
- In Microsoft Stream select “My Content > Videos” from the top menu.
- You will be brought to a list of videos that you have recorded. From this list you can find options that allow you to edit video descriptions, sharing options, and trim video.
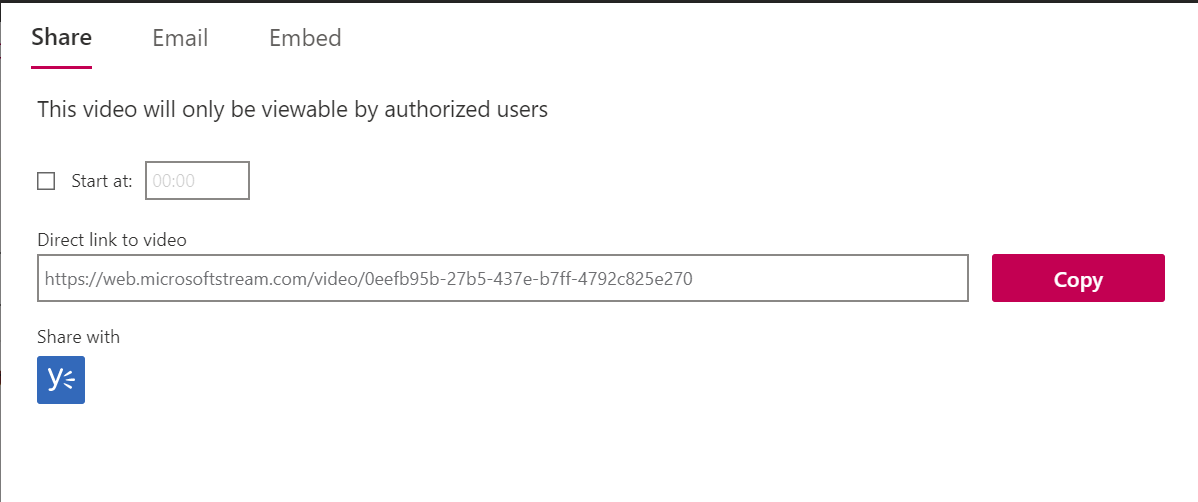
- Sharing options will allow you to make the video visible to the entire organization or share with only specific people.
- Clicking “Share” will allow you to share the video by link or create an embed code to embed the video into a website.