Accounts Payable- Invoices Instructions
Part A:
– Highlight the following areas on your invoice: invoice #, invoice date, and vendor remit address.
(Some invoices do not provide an invoice #, in that case, write down the invoice # you have come up with. In the past we suggested you use the vendor number and the total amount of the invoice, but you are welcome to come up with the criteria that best serves your department in keeping track.)
– Write down the GL number on the invoice.
Entering Invoices in Eden:
*Use the tab button in keyboard to move through boxes.
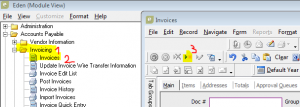
Invoicing//invoices//insert a new record

Part B:
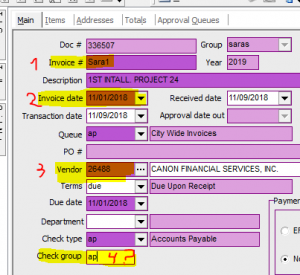
Enter the invoice #//invoice date// vendor # and tab//

On the description line always type the Acct#;costumer or client #; Project or contract #; or date of monthly payments. (whatever it is best to track invoices in the future…(Detail description you can add later, in the items line.)
Make sure you first delete the invoice date, and then type the correct date the invoice reflects. (if the invoice date and the transaction date are the same you have probably not entered the correct date)
Eden populates one single check for multiple invoices for the same vendor, so if you want a check to go separate type the initials of your department in the check group area.
Please always do this for the U.S bank and the other common vendors other departments use such as PG&E, Verizon, and the water district.
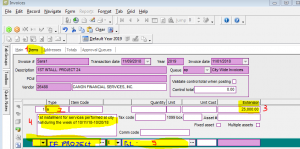
Items//Type (select type of expense)//extension (input the amount of money)//add detail description//enter GL account

*if there is a project enter project # here
Part C:
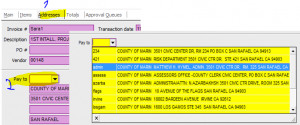
Addresses//check the address is the correct remit address. If it is not the correct remit address, browse on the list until you find the correct one
If the remit address is not on the list, send an email to vendor. Request to update or add a new vendor address. Please remember that if a vendor moved locations, you must attach a new W-9 to the email.
